Pages

Aug 30, 2012

Office: Move-In to Present

Our office is probably the most "finished" room in our house.  Steve and I spend a lot of time in there, and so do our fur babies, so it made sense for us to really focus our efforts on making the office comfortable and functional sooner rather than later.

The office in our old house was kind of a mess.  My desk was crammed in a little cubby right in front of the window.  Steve's desk took up an entire wall of the room.  All of our furniture was hand-me-down (with lots of warping and chipping particle board) and nothing matched.  We decided that for this house, we wanted a more fair division of space between the two of us but we still wanted something that looked cohesive- we were aiming for "one office" rather than "two offices in one room."  We also knew that we wanted a ton of storage and display space.  Enter Ikea's Expedit series.


The view from the hallway.

Closer view- this photo was taken last winter, before we hung the pictures and switched out my task light.

We used two 4x4 Expedit bookcases and two desk inserts to span one entire wall of our office.  Boxes from Ikea hold everything from office supplies to the current year's records to excess knick-knacks to our router.  The unit did a nice job of making this space look like one office.  And our respective sides of the bookshelf helped us individualize our spaces.

The girly side.

My side's stashed with my favorite books and keepsakes like yearbooks and old Bibles.  I've got task lighting thanks to Ikea, a couple of cheap mirrors, a clock, and some vases (the green one was my grandmother's and the small silver one is from Steve's family).  I've also got some of my little kitsch next to my monitor- a baseball signed by the '89 San Francisco Giants (a gift from my Grandpa Lane), a tiny ceramic cat playing a tiny ceramic piano, a photo of my friend Rebecca and I from a trip to tennis camp in '96, and gifted pins and plaques.  I opted for a chair that looked a little more formal than a typical office chair- it came from Target.

Command Center.

The wall behind my desk helps us keep track of pertinent details.  Obviously, the calendar helps.  The organizer pockets on the left are rigged together with ribbon and hung on an adorable bird hook I found at JoAnn Fabric (here's the tutorial I used for the organizer pockets on Pinterest).  The top left pocket serves as our "inbox."  Things go here that need to be dealt with- bills, coupons, take out menus.  The top right pocket is for my random things that need to be kept track of but that I don't want living on my desk- receipts, paint chips, tickets to upcoming events, that kind of thing.  Steve's got the bottom left pocket for that as well.  And the bottom right pocket holds extra greeting cards that can be used in a pinch.


The manly side.

Steve used his side of the office as an excuse to put up all of the things that I would not let him put anywhere else in the house!  The Corsair poster, framed tattoo drawings (a gift from a friend), a howling wolf statue, vintage binoculars, a wooden gun that his grandfather carved, models of tanks, pictures of his team when he was in the Army, his firefighter hat, a bottle of "Viking Blod" Nordic honeywine.

Since most of our books are in this room, we also wanted a comfortable space to curl up and read.


Book time!

There's a fuzzy blanket hidden in the leather cube, and plenty of continued manliness on the walls.  Steve's Army medals and certificates, his grandparents' vintage rifle, his collection of steins and jugs, and a flag from the USS Arizona.  Steve and I both wish we had a handy place to set a drink near this chair, but there's not much room for that.  Maybe a floating shelf or a C-table one day?

We needed two more things from this room:  room for extra storage and records, and a place for the doggies.  Our dogs want to be close to us wherever we are, and since we knew we'd be spending a lot of time in the office, we wanted a place for them to rest comfortably without being underfoot.  Hence our closet:

Business up top, sleepy snuggles down below.

The icky bi-fold doors were taken down and replaced with a curtain rod to pretty the room up but also allow for maximum air-flow.  We ripped out the wire shelving unit (they were ubiquitous in this house's closets) and Steve built shelving to fit around our doggles' crate.  It works awesome!  We've got all of our records plus several boxes of keepsakes or dog-care items up top, and the dog crate and Tupperware food bin on the bottom.  When we put the dogs up for the night, or when guests come over, we simply close the curtains.

We are really happy with how the functionality and look of this room turned out, and we don't have many other plans for upgrades (Steve's obsession with computer-related hardware aside).  That's fine with us- it's easier for us to unwind in the office because it's finished and it leaves more time to focus our work on the rest of the house!


Aug 29, 2012

If At First You Don't Succeed...

...Wait until you spot a great deal online and try again.

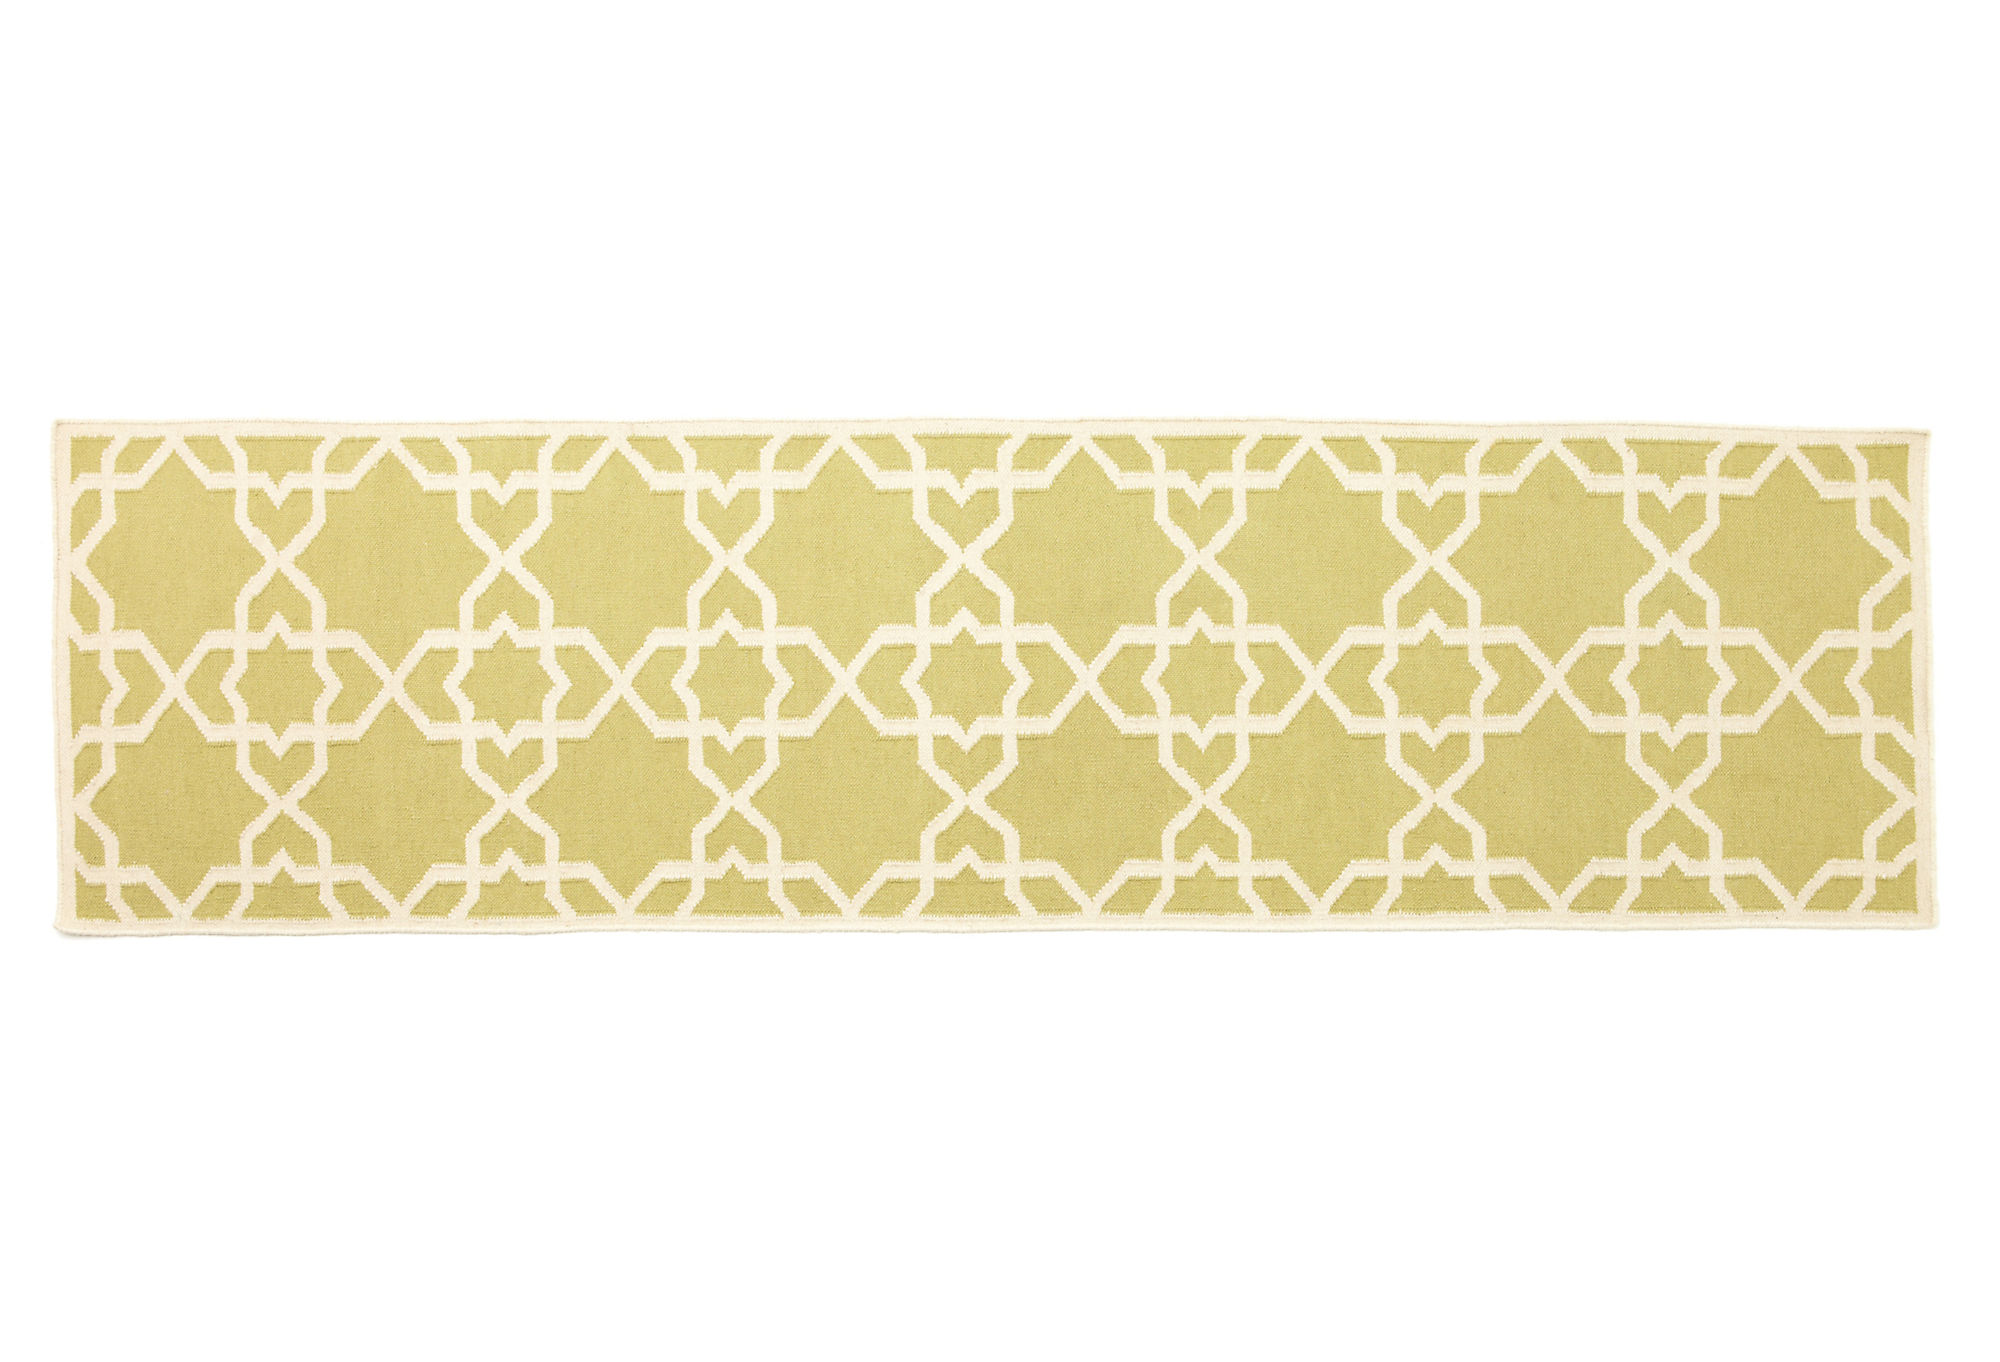
After the bummer that was our Crate & Barrel kitchen rug fail, I have been gun-shy about trying to find another rug that'd fit our needs in the kitchen.  I have done a ton of browsing, but no buying.  Until now.


I pulled the trigger on a very pretty geometric rug from One Kings Lane.  It's a little more than I wanted to spend (I was aiming for $100 or less), but it's also the perfect length (most runners we found were about 8' long, this one's 10), and I love the pattern, and it was half off (See that "You're saving $141.00"???).


I am crossing my fingers that the color will match what's represented on the website, and not compete with what's already going on in the kitchen.  I am hoping it'll withstand high traffic and the occasional drip or splatter (John and Sherry have a larger version of this rug in their living room and they have a toddler, so I should be OK, right?).  And I hope it's soft on the toesies.

Whaddaya think?  Will it work?

Aug 28, 2012

Guest Bedroom: Move-In to Present

I decided this morning that I needed to update all of my blog posts by labeling which room or area they were about so that I could easily follow the progress through a given room across time.  I was shocked to realize that I haven't finished giving a house tour yet!  So without further ado....

You're seen the exterior of our house, the entry, the kitchen, and the dining room.  Then you've seen the areas in the middle of the house- the guest bathroom and the laundry closet.

Now let's start moving toward the back of the house.  The guest bedroom is across the hall from the guest bathroom, to the left of the laundry closet.  And it looks like this:

Cue the horror music!

Hmmm, maybe that's why I stopped with the house tour photos?  Ha!

There's actually a bed under there.  Not that you'd know.  This room is full of items that are waiting to be sold on Craigslist, gifted, taken to the local Goodwill store, mended, or used up.  Obviously we don't have overnight guests often, and that may be a good thing... the mattress on that bed is my Grandmother's.  It's about 30 years old.  And when you lie down on it you can feel every single one of those years.

Eventually we'd like to get this room cleaned up so that it's at least serviceable.  Maybe one day it'll turn into a nursery, who knows.  But until then, the door to this room is remaining closed at all times!

I know we're not the only ones that have (at least one) space in our house that looks like junk piled on top of junk.  Where's the messy area in your home?

Aug 27, 2012

Little Fixes

This past week found us finally getting around to fixing a few niggling details in the living and dining rooms.

Piano before, with mirror leaned on top.  (Read more about how the piano came to live with us.)

Don't you dare mess up the finish on that piano, mirror!

Piano after, with mirror hung from the wall.

Yeah, the mirror's a smidge too close to the piano.  But it's a start.

Crystal display hutch before, being crowded by the *awesome!* new drapes.  (Read more about making the Crate & Barrel Bella Porte Citrine knock-off drapes.)

I wish you could tell how cloistered that hutch is.

Crystal display hutch after, having been shifted about three inches away from the corner.

Breathing room!

Another pic with terrible lighting, just for fun.


Drapes before, being a steely blue-gray.

Muted and not-quite-going.

Drapes after, having switched to a fun turquoise velour.  (They seem to have mysteriously disappeared from Ikea's website.)


Turquoise funs it up in here.

You may have also noticed that the area rug we had in that room is missing.  We still love the rug, but once we switched pianos, there were just too many large, dark, brown items in the room.  It's chillin' in our garage right now.  We're thinking since it's an indoor/outdoor rug, it'll be great if we build the covered outdoor living space we've been pondering for next year's project list.

So the next steps will be to patch, sand, and paint the holes from our dining room drapery rods before we raised them about a foot to maximize their impact and match the height of the rod in the living room.  And hem the curtains in the dining room.  If my contract is approved (cross your fingers!), then I will be back to working a contracted schedule on Thursday.  Think I can get that taken care of before then?

Aug 20, 2012

Tickling the Ivories

I love craigslist.  I will browse it just for fun, just to see what's out there.

A couple of weeks ago I was browsing the antiques section when I came across an ad that read:

Antique piano.  Beautiful 1913 Brewster upright piano.  Good condition.  Asking $25.00 OBO.  Pick up only.

And it came with this picture:

In all its off-centered glory.

Was I looking for a replacement piano?  No.  But this piano looked gorgeous.  And $25??  It seemed too good to be true.

And then this happened.

Voila!

When we went to take a look at it, we saw that it was indeed in good condition.  Four keys in the lower register had small chips off the ends of the ivory.  One key in the upper register stuck unless it was struck forcefully.  It hadn't been tuned in 10 years or so.  All pretty minor offenses.

Why are piano branding scripts so magical to me??

It had an amazing backstory, as well.  The piano was bought brand new by the current owner's grandmother in 1913.  It was built in Brooklyn.


Serial number and scrollwork.


The grandmother taught piano lessons as her livelihood.  When she had a daughter (the owner's mother), the piano was passed down.  She taught piano lessons as well.  When she had a daughter (the owner), the piano was passed down. 

You can see the color on the black keys has worn from use.

The owner took lessons as a child but never played.  She's kept the piano all her adult life because of its sentimental value.  But she and her husband have a very small house and needed the room so she decided that the time had come to part with it.

I love the detail on the shelf.

She had originally listed it on craigslist for $100.  The piano is likely worth $100-300, but she didn't get any offers.  Every week she lowered the price and every week it went unnoticed by craigslisters.  Until me.

The finish has developed fine cracks over time.  They're invisible from a distance, but the case feels like pebbled leather to the touch.

And the sound!  It should be said that antique pianos usually don't have great sound.  Without proper care there's a million different things that can wreck a piano's sound.  Compound that with nearly 100 years?  Ugh.  But this one sounds lovely.  It needs a proper tuning to be sure, but because this piano has been cared for so well and is so much bigger than the one I grew up playing (the soundboard is a little over a foot longer), it has a very rich, full sound.  At the risk of sounding like a wine snob, I'll even use the adjective throaty. 

A timeless beauty.

Because of its height, classic shape, and beauty, we have no need for a mantel in this space anymore.  The top of the piano will serve.  We love how commanding it is- and elegant at the same time.

And just for comparison's sake, here's the before and after.


It feels like fate.  And looks sooo much better!

Aug 17, 2012

Let The Sun Shine In

Project Fun-Things-Up-In-Here got a major shot in the arm.  Well, in the window.  As in new drapes for the dining room!  (You can read about my mission to bring a little fun to our house here and the plans for the drapes here.)

Big kudos to my Mom for helping me with the sewing.  On a 90 degree day.  In her second-floor sewing room with a southern exposure.  And no air-conditioning.  (She loves me.)

Yay for mommies!

First we had to cut the panels to size.  Steve and I had raised our drapery rods to 95",  and we needed to leave some extra for the rod pocket, and then a little more for me to hem them to exact length after they were hung up in the dining room.  We ended up unrolling the fabric on the floor in my parents' foyer because it was the only place we could get 105" of flat surface area.  After we snipped the first panel, we just used that as our cutting guide for the other three panels.

That's a lotta yellow.

The trellis pattern made all of our hemming and cutting really easy because we just followed the patterns.  Lucky for us, the repeats were frequent enough that we were able to create panels that followed the exact same patterns.  Once we drug the panels upstairs, we needed to make sure that we put the rod pockets on the same side for each panel so that the pattern would appear aligned across both windows.  So, I took a picture of the pattern for the "top" of each panel.  Naturally.


This side up.

We noticed later that the edging actually had arrows that we could have used, but since they'd shortly be ironed over for hemming anyway... whatever.

When Mom helps me with sewing projects, it usually means that I do the ironing (the grunt work) and she operates the machine (the scary part).  It works pretty well for us.  It's *definitely* faster than doing it all by yourself.

Here's the first fold for the side of the panel.  Since the fabric was 55" wide and I wanted my panels to be at least 50" wide, I just used the color to guide how deep to make my first crease with the iron.


Follow the yellow brick(?) road.

Then we used the pattern again to iron our second crease.  See what I mean about how helpful the stinking pattern is?  Plus the fabric ironed like a dream- nice and crisp.  We also liked how thick the side hems are.  Mom and I thought it'd look more professional with thicker hems.


Dreamweaver.

From there it was all Mom's job. (And it was my job to get all up in her business to take pictures.)

Nice job, Mom!

After we had hemmed all of the sides, we repeated the process along the top of each panel, leaving about 3" for the rod pocket.  We didn't line these drapery panels because a) I'm lazy, b) did I mention it was 90 degrees that day? and c) Steve and I are the type of people that like privacy sheers but still like light, so lining seemed unnecessary.  We also left the bottom unhemmed so that I can hem them to the exact length I want once they're hung.  Here's two of the panels folded and draped on the bannister in my parents' house.  They are sooo long!  The rod pockets are laying on the floor behind the bannister rail.

Cheery yellow in bulk.

And then my sweet husband hung the panels that night while I was out to dinner with friends.  Love that man!  Unfortunately, my pictures don't do them justice.

Hello, drapes!

I was surprised how little extra fabric drags on the floor.  Like maybe two inches worth.  That'll make hemming them super-easy.  And gotta love Ikea's Lill sheers.  Less than $10 on sheers for that whole room.

Love it!

I am especially happy with how they turned out.  I was a smidge worried that they'd be overwhelmingly yellow, but the charming lattice design makes them fit right in.  Although they surely make a statement.  They totally Funned-Things-Up in our dining room.  Now I just have to get around to hemming the bottoms....  One project begets another, right??

But still, I've pretty much stuck a fork in this project.  How do you like them apples, Crate & Barrel?!


Aug 4, 2012

Guest Bathroom Vanity Reveal

It's about time!!

In truth, the vanity is not DONE done.  I can see some indications of bleeding that will likely need to be sanded, Killz'ed, repainted, and resealed in the coming months.  But for now... DONE!

So fresh and so clean clean

Blends so much better!

I love how much more modern, clean, and soothing the bathroom looks now.  I'm glad we went with the plain knob pulls as well.  While they're not super fun, they fit the bill, were cheap and durable, and if at one point we ever sell or rent this house (or change our decor), they'll "go" with so much more.

The whole project was super-cheap.

Tape:  $7
Paint: already had
Brush: $4 (had to replace my gooky one)
Cabinet pulls: $17

Grand total:  $28!


And just for comparison's sake, here's a before and after.


So much better!


So glad to have this one done and out of the way!  For more on the process, click here and here and here and here

Aug 3, 2012

Hey, Weren't You Guys Painting a Vanity?

Yes, that project is currently "in progress."  Really, really slow progress.  After a third coat of paint, everything just sat and cured for a little over a week.  Today I finally got back to business.  Not because I want to keep working on this project, but because I want to finish and never have to work on it again!  I felt the same way when we painted our kitchen cabinets, too, but conveniently forgot about my exasperation until I cleaned the same white paint out of the same paintbrush for what seemed the millionth time.

Oh, woe is me, right?  Nah, I'm over it now and moving on.

So.  After the third coat of paint got me allllmost the coverage I wanted (but still that chalky texture) I realized my error and switched to semi-gloss.  It didn't seem like the Floetrol was helping anyway.  One more coat of semi-gloss and everything looked great.  I did some touch-ups in spots where the paint had pulled away from the back splash when I removed the tape.


Oops.

Then it was on to sealing.  I still had a mostly-full gallon of water-based poly from when we painted our kitchen cabinets, so I just used that.  Thankfully, poly is clear, so it's forgiving *and* it requires fewer coats to do its job properly (lazy painting is my favorite kind of painting).


So white!


I am waiting for the poly to dry and then it's time for knobs... and then the big reveal!  I almost opted to go the fancy route with the pulls.  Anthro has some gorgeous ones for $8.


But mercury glass would be less durable and would be harder to work with if I want to change up the look in there again (God forbid).  So I think we're going to go with economy and flexibility and get some nice satin nickel knobs.  The rest of our accessories in there are pretty much all satin nickel with spherical accent points anyway, so I think these guys from Lowe's should do us just fine.


Can't complain for less than $20 to outfit the bathroom.

Cross your fingers that I'll have a reveal post for you before next week!


Aug 2, 2012

Taming More Coffee Table Clutter

I love Ikea.  I actually go to Ikea maybe two times a year.  And yesterday, with Steve gone to work in the morning and over to a friend's house for poker in the evening, I decided on a whim to go have some fun myself.  I made the 2 hour drive down to Ikea.  I stopped for a frappucino on the way down.  I played my favorite band's brand spanking new album at top volume.  I drove with sunglasses on and my sunroof open (this is western Washington, people.  We have to enjoy it while it lasts!).

But I digress.

Ikea.

I was hoping I might find a cute tray or box that I could use to make the clutter under our coffee table look a little more "controlled" and less "chaos."  I found it!  Steve and I make heavy use of Ikea's hanging-file sized boxes in our office, so I knew something along those lines would work.  I found their small Kvarnvik boxes.  They looked so cute with the rustic pull on the front and the roughspun texture.  I got two.


Cute as a button.

I decided to use the boxes for DVD management.  We have two binders of DVDs (most courtesy of my mom's frequent trips to the markets in Shanghai before she retired) and a couple of DVD boxes, all of which were hanging out on the lower level of the coffee table.  Each Kvarnvik box is just a little wider than one DVD.  I didn't have anything to keep the DVDs from getting scratched up and rubbing together, so I decided to just cut each page of sleeves out of the binders, then cut them into individual sleeves so I could just plunk them straight into the box.  Mission accomplished!

Hello Mr. Pitt.

Things look so much neater now!  If we want to watch a DVD, we just pull the box out and rifle through it.

I love Ikea.

I got a few more fun things while I was there- more on that later!

Aug 1, 2012

Project Round-Up

This summer is totally flying by.  I have worked more this summer than I have since I had an actual summer job (the cause of my slowed blogging of late).  And we've been constantly busy with house projects, big and small.  And my social life is kicking into high gear for the next month or so- line dancing, outings on a friend's boat, concerts, trivia at the local Irish pub, camping trips.  I've got too many irons in the fire.  Lists always help me calm down and sort through the noise when I get into these situations.  I know it's dorky, but I am a total left-brain kind of gal and it works for me.

Here's what's cooking between now and September.

House Projects:
  • Finish the vanity in the guest bathroom.  The vanity itself is done except for some touch-ups.  The door faces probably need one more coat of paint before they'll look done enough.  And then I'll need to add hardware (still haven't picked the perfect drawer pulls yet) and reattach the doors.  Hopefully I can finish this project within a week.
  • Make curtains for the dining room.  I already have the fabric (which I am soooo in love with).  Hopefully next week we can raise the curtain rods to match the 96" high ones in the living room.  I would also love to make a trip to Ikea- I think some Lill sheers would be just the ticket for preserving our privacy without sacrificing light.  And then I have to wait for my mom to get back from her camping trip to help me actually sew the dang curtains.  Although this is something that I *might* be able to accomplish on my own, I am admittedly wary of sewing machines and I'd feel so much better if my mom was around to help me.
  • Figure out a rug for the kitchen.  I have been kind of stumped since my Crate & Barrel rug failure.  Steve finally suggested that I just make my own rug, so I can customize its size and style.  Hmm.  That hadn't occurred to me before.  And I do have a couple of rag rug tutorials pinned on Pinterest.  Something to chew on.
  • Piano switcheroo.  I haven't posted about this yet, but here's the spoiler:  I found an amazing antique piano on craigslist and it is coming to live in our house next week.  I think it's large enough that we won't need a "mantle" above it like my current piano begs for.  It's going to be a kick in the pants playing it, not to mention decorating the top of the piano and the wall above it.
  • Wash all of the exterior windows.  When I washed the house to prep for painting, so much of the icky mildewy runoff got all over the windows and they're still super streaky.  This will be a quick project but will pay dividends in improving how clean our house looks (inside and out).
  • Clean my car really well.  My dear 13 year old car has suffered a lot of abuse since I started my math coaching gig.  I have to schlep 2-4 boxes and bags of stuff between the four buildings I work at, so my car is constantly full of stuff.  I don't think it's been properly vacuumed out since last fall.  And the exterior is still sporting some spray paint over-spray from last August.  How embarrassing.

Work Projects:
  • Create Pocket Guides for grades 1, 2, 4, and 5.  This project was the brain child of a first grade teacher and recommended by a consultant from the National Education Association who's been working with our school district.  A group of intrepid teachers came together with the coaches in June to do the background research in matching our current curriculum, Everyday Math's 3rd Edition, to the Common Core Standards for Mathematics.  The work that we did in June has helped us build documents we are calling "Pocket Guides" which will serve as abbreviated reference points for teachers to better target their instruction to meet standards.  We've got partially-finished drafts of the Kindergarten and third grade Pocket Guides, but still need to work on the rest of the grades.
  • Finalize plans for the Summer Math Institute for second and third grade teachers.  We've been planning this four day professional development series since April and had a full working draft since early June.  We need to come together to take care of all of the nuts and bolts and transform our draft into consumable pieces- agendas, charts, black-line masters, planning templates.
  • Math Benchmark Assessment Item Review.  Because of the switch from state standards to Common Core Standards (I believe 47 states have now adopted these standards to be fully implemented by 2014-15), the state committee responsible for writing Math Benchmark Assessment items had to create a significant amount of new items last year.  I'm on the committee to review the artwork and diagrams that go along with these items to ensure that the graphic artists' representations match the problems.
  • Finalize plans for support in 2012-13.  Three schools in our district are trying on RTI (Response to Intervention) next year.  I coach in one of them.  It has still not been decided for sure how my time will be allocated across my 4 buildings.


Phew, that's a lot!  To save myself from feeling overwhelmed, here's what I've already accomplished this summer.  Click the links to read about them if you missed 'em the first time around.

We wrangled the clutter on our coffee table courtesy of an awesome rustic tray from Joss & Main.

Scored an awesome high-arc faucet from the Habitat for Humanity Re-Store.

Added some extra whimsy to the entryway courtesy of some amazing off-the-cuff art from my lovely sister-in-law, Tabi.

House crashed my in-laws' new abode.  So far Steve has helped them install their new washer and dryer.  Looking forward to helping them with more transformations!

Got started with painting the guest bath vanity- a project that's been on my to-do list since we bought the house.  Part 1  Part 2  Part 3

Purchased fabric for Crate & Barrel knock-off window treatments to modernize the dining room.

Painted the exterior of the house and switched out the light fixtures.  Phew, that was a big project!

Started the prep work for bulking up the faux mantel to lend more balance to the wall behind the piano.

Brought some fun and whimsy to the entry by switching out a plain jane rug for a bright one in a modern pattern.

Upped the kitsch factor by adding a squirrel pillow to the bench in the entryway.

Removed the haze from my car's headlights with a damp rag and toothpaste.


....All that in a little over a month.  Makes me tired just reading about it, haha!  Maybe I *can* accomplish most of those between-now-and-September projects....!