Pages

Jul 15, 2014

Guest Bathroom Reno: Episode 461

I cannot believe that we started our guest bathroom reno last NOVEMBER and are still not quite done.

Yes, the tub and shower are done, and that was what we originally were aiming for.  And we really like how our subway tile surround turned out.  Now we're mostly into improving the aesthetics, since we know this bathroom will now be a place used heavily by Mr. Baby and his needs.

Since the last update, a few things have happened.  I repainted the ceiling the same color as Mr. Baby's room- Gray Owl by Benjamin Moore.  Steve has begun trimming out the room and we've got floor-to-ceiling bead board on one-and-a-half walls.  I've caulked and painted the bead board that's already finished.  All of these things were planned.

So fresh and so clean clean.

We did make two unplanned improvements as well.  After helping my parents install some new toilets a few months ago, we decided to upgrade our toilet too.  Costco had awesome toilets, so we sprung for those.  The new toilet is chair-height, which means it'll be easier for our less-agile family members (which includes me at the moment!!) to get on and off the toilet easily.  It's also one piece (easy installation and cleaning), low-flow (our old toilets were not), less prone to clogging, and quiet.  Plus the sale price at Costco was about $400 less than the particular brand of toilet normally costs.  Our other unplanned improvement is still in progress.  The motor in the bathroom fan gave out.  Since the fan is loud, difficult to operate (it's on a timer switch), and moves less air than is necessary in a bathroom that size, we decided to purchase a new high-capacity fan that's much quieter, and change out the timer switch to a regular on/off switch.  Unfortunately, installing the fan will require Steve to crawl through our ceiling, so we've been waiting for Steve to finish his boss' desk and for the weather to give us a nice cool day so that he doesn't roast up there.

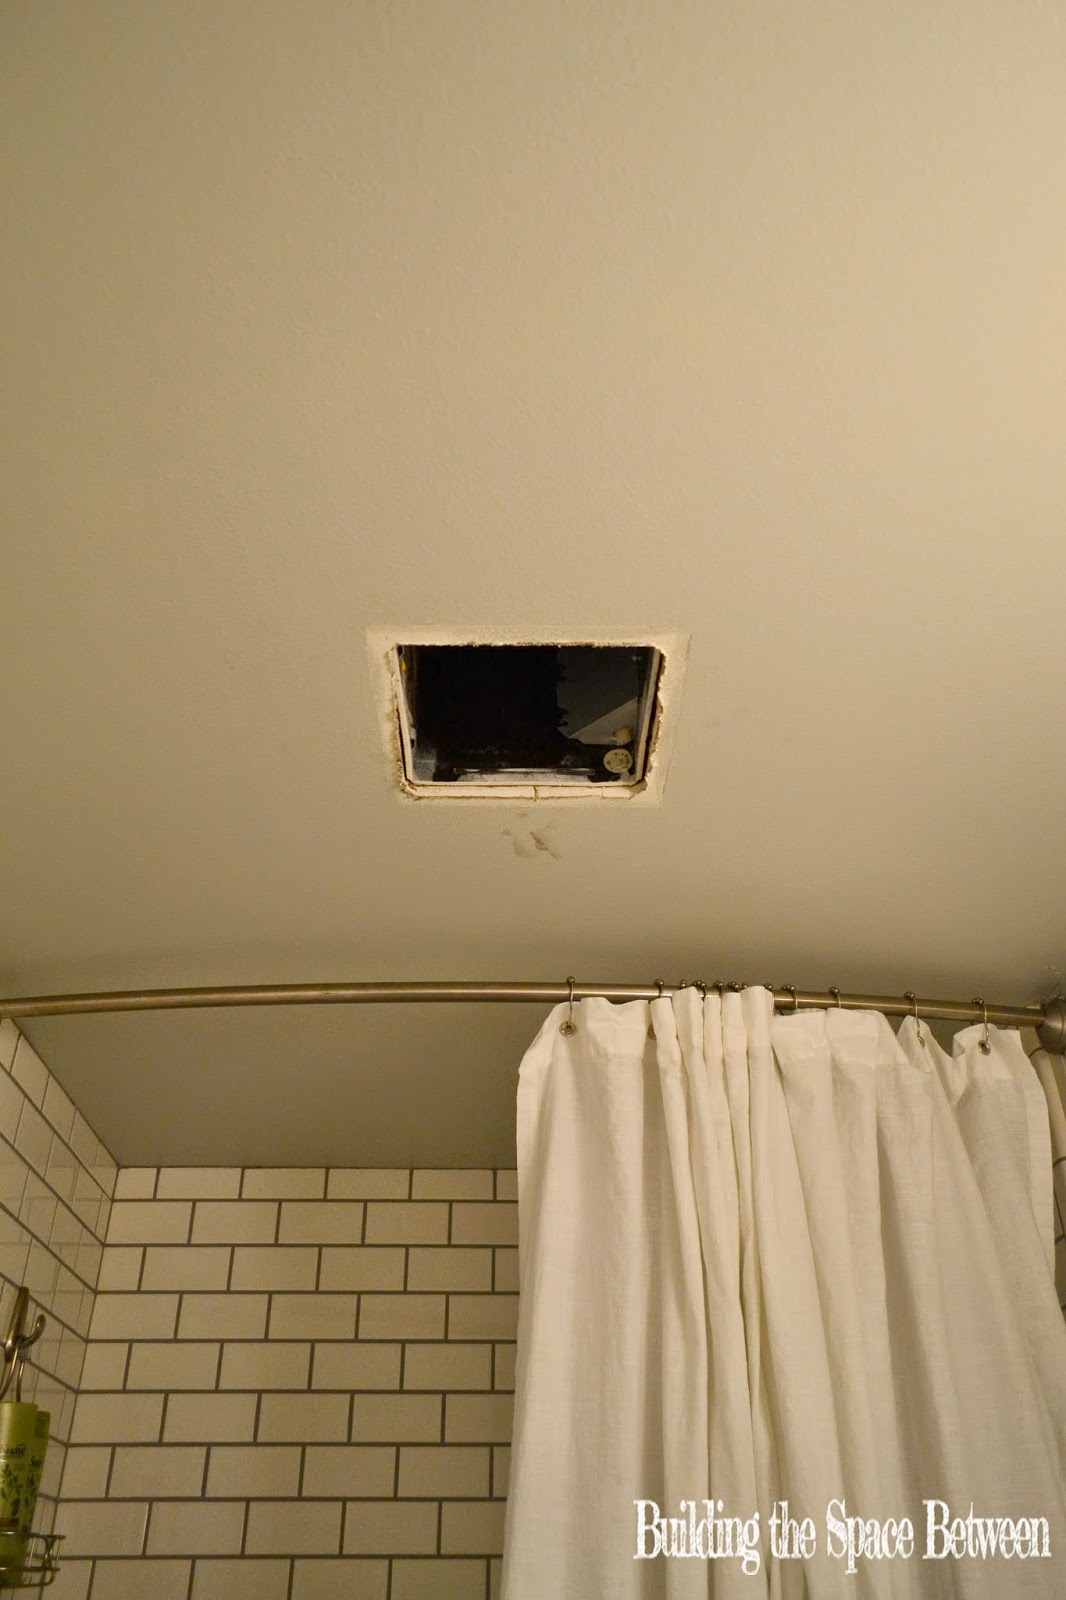
Less than fan-tastic.  Har!

All the rest of the updates are fun aesthetic updates that are bumping up the color factor in this room, coordinating a little better with Mr. Baby's room, and better serving the functional needs of a bathroom that will soon be used mostly by a little boy, sometimes by visitors, and occasionally for overnight guests.  I painted our mirror frame the same blue that I used on Mr. Baby's chest of drawers- Twilight Chimes by Behr.  The rugs, towels, and new soap dispenser all came from Target (which I managed to purchase on sale- yeah!).

Hello, nasty unfinished wall!

My favorite update though, was the trickiest one for me- the shower curtain.  It was easy enough to find a shower curtain liner long enough for our shower curtain rod, which is hung just below ceiling height.  I was having a terrible time finding a fabric shower curtain that would be long enough, not look cheap and junky, be easy to wash, and let a decent amount of light through.  After searching and searching and coming up empty handed, I decided to make my own shower curtain.

DIY shower curtain.

I purchased two 96" length rod-pocket curtains from Target.  The ombre effect seemed like it might be bright enough to let in decent light, and the teal color coordinated beautifully with the bath mat.  After pre-washing the curtains, I did some math- I measured the opening of the shower and the width of the two curtains, and chose to place the grommet holes about 8" apart (the grommet holes on the liner were more like 6" apart) leaving 3" of extra fabric on each end and overlapping the two grommets where the curtains would meet.  Originally I forgot about needing to overlap the grommets, which would have left me with a gap between the two curtains right in the middle- oops.  After I carefully measured, marked, and cut holes for the grommets, I used a grommet kit from Michael's to tap the grommets into place.

Please ignore the unfinished wall bits.

I love how it turned out.  The fabric is nice and light.  The color at the bottom of the curtain is saturated and matches the bath mat really well.  I didn't have to do any sewing at all.  Best of all, this little DIY project cost less than most of the 96" shower curtains I found on the interwebs- less than $5 for a grommet kit, and two curtains from Target (also purchased on sale).  Not only that, but the height of the shower curtain makes the room look taller and roomier than it is.

From this angle the bathroom looks finished!

Pretty sure I will never buy another stock shower curtain again.  :)

Jul 14, 2014

A Clearer View

I have a confession to make.  We hired out.

The seal in our kitchen window gave out last fall.  Yes, the same kitchen window we had partially replaced in October 2011 shortly after we moved in.  The broken seal wasn't effecting the window's performance too much other than a little fogginess.  And then the seal started decomposing and dripping down between the window panes.  Unfortunately, we were the only ones that knew what those gooey-looking white streaks on our window were.  To every other observer who's been to our house in the last nine months or so, it's looked like our window has been serving as a bathroom for seagulls.  Ew.

So the entire window needed replacing.

Yes, we still enjoy DIY.  Yes, this project would've been perfectly do-able for us.  Yes, hiring out is much more expensive than DIY.  However, we decided it'd be the best choice for us right now.  We remain very busy with other projects (Steve is building his boss a huge work table, our bathroom is still not entirely finished, the nursery needs a little more work), I'm hugely pregnant and wouldn't be able to assist with the window, and we really wanted to have the window replaced before we reached the hottest part of the summer.  The time and effort required on our end at this point was far greater than what professionals would need.  For us, in this case, it was worth forking the cash over to have someone else do the grunt work.

And boy did it pay off (har).  We decided to hire through our local big box store because they guarantee their work (something that the local company we went with in 2011 did not).  Despite taking about six weeks from initial consultation to finished installation, we only had people out at our house for a grand total of about two hours- an hour for initial consultation and quote, 15 minutes for the subcontractor to check the site and double-check measurements, and 45 minutes to cut out the old janky window and replace it with a shiny new window with thicker panes, a screen, and a 10 year warranty.  If we'd have done this job ourselves, we would've needed to buy some tools we didn't already have, custom-order a window, and the removal and installation process would have taken at least a full day's worth of work timed to a weekend when Steve's dad would be around to help.

All fixed!

Now that the new window's in, I can't believe we lived with it the way it was for so long.  It's so much prettier (since it doesn't look like it's been victimized by birds), and we can finally open the window for ventilation while cooking now that there's a screen on it.  I've also noticed that the contents of the sink get less hot when sun is shining in the window- because of better insulation, I'm guessing.  The best part of all is that neither Steve nor I had to take any time away from our other projects to get it done.

What do you consider when deciding to DIY or hire out?

Jun 23, 2014

The Nursery Now

Oh hey there.  I have a blog?  Oh yeah.  I suppose now that the school year is over, my brief stint of jury duty is over, and I don't have to worry about setting up a first grade classroom in July at eight months pregnant after all (three cheers for Dave Ramsey, FMLA, and careful financial planning!), maybe I could update this blog thingie.

So let me get up to speed with where Mr. Baby's nursery is now, since I haven't posted about it here in over a month.

We decided to repurpose the mantel Steve made when we first moved into this house into a header for Mr. Baby's window.  We knew that there would be a lot of painted items in this room, so it seemed like it'd be nice to have some wood tones.  Also, the mantel is special because it's one of Steve's first woodworking projects.  And can't beat a little extra display space for sentimental and decorative items like Steve's firetrucks, Grandpa Mel's old binoculars and the toy revolver he whittled and painted.

Boy stuff.

Next, I tackled refinishing the dresser Steve's grandpa made him when he was a boy.  In our last discussions, we were considering doing some kind of a distressing treatment, but after stumbling across this camp dresser in the Pottery Barn Kids catalog, I was completely sold on going blue.

{via}

After removing the drawer pulls on our dresser, filling the holes and sanding them down, and repairing some minor damage like reinforcing some slides and re-nailing in some spots where things were pulling away, everything got four coats with a small foam roller of the same blue that is on our back door, Behr's Twilight Chimes.

Lookin' sharp.

The body of the dresser got four coats as well, and everything got a couple passes with water-based poly to protect from the damage regular use is sure to inflict.  I loved the color when everything was put back together, but it still lacked personality.

Missing something....

It wasn't until we got the barn-style pulls attached that things really came to life for the dresser that Grandpa Mel made.

Campy.

The turquoise tub was a shower gift and is currently holding all of Mr. Baby's bath time things.  The baseball plaque was Steve's when he was a kid (the back of it is held upright with wire, string, and tape).  The bowl is a melamine cereal bowl from Target and is holding Mr. Baby's collection of pacifiers and binky straps.  I love that this piece essentially became a pottery barn knockoff for all of $16- we purchased the pulls new but had everything else on hand.

Mr. Baby's changing table is still about in the same spot as far as being "finished."  Our only update there is that the drawers have filled with diapering supplies and baby clothes since my baby shower.  More diapering supplies are on their way, so I'm hoping to make more progress on this area in the next week or so.

On the opposite side of the room, Mr. Baby now has a bookshelf!  I re-purposed this cheapo Wal-Mart shelf that had previously been holding math manipulatives in one of the buildings I worked in.  The lamp and the orange wire basket are both from Target; everything else is from my childhood or was a shower gift. Eventually I'd like to hang some narrow forward-facing shelves on the wall above for books that need to be handled carefully.  Rain gutters and spice racks seem to be popular options for this, according to Pinterest.  Maybe I'll have room for some art there too?

Fun times ahead for Mr. Baby and Grammy, who loves to read to littles.

The most recent updates in this room are the ones that are starting to finally make this room feel a little finished.  I finished staining the rocker skis for our wingback chair and Steve attached them earlier this week.  The chair is nice and tall.  We're actually considering getting a little pouf or ottoman to make it easier to rock Mr. Baby while in a lounging position.  The skis added a couple of inches of height to the chair, so my feet don't rest flat on the ground unless the chair is rocked all the way forward.  We also added some light-blocking drapes around the window in a really pretty navy with subtle aqua stripes  (from Target, found here).

Looking better!

Although I am feeling a little panicky about not having the room "done," I keep having to remind myself that we still have six weeks before Mr. Baby is due to make his grand entrance, and he's not going to care a whit if the room doesn't look exactly like I want it to.  And I'm very happy with how the room is coming along so far.  Steve is too- a few days ago he wandered into the nursery and then remarked that it's his favorite room in our house so far.

I hoping to have another nursery update within a week (pending a giant shipment from Amazon arriving here), so cross your fingers for quick shipping!