I have an awkward confession. I have big feet. Like, really big for a gal who tops out at 5'7". I wear an 11. And, being a girl, I harbor a deep abiding love for cute shoes. This has led me to be a compulsive shoe buyer. I hunt religiously for 11s. If I see them in a cute style, and I try on that style, and if (miracle of miracles) they fit and are comfortable and don't make my feet look like boats, I buy them. End of story.
Well, almost. It's gotten to a point where it's become difficult to wrangle so many pairs of cute shoes. Especially now at the tail end of summer, where every pair I own that's not boots gets a little action. It's not like wintertime when all of my sandals get tucked up for the season and I have tons of closet space for my little closed-toe pretties (#firstworldproblems).
I have a point, I promise. About a month ago, Nine West had an amazing sale. They pretty much never stock 11s, but I love to browse anyway. So back in the clearance section, I found a pair of amazing coral flats. In 11. And way comfortable. And $14. IKNOWRIGHT!?! And wouldn't you know they had a pair of navy patent flats right next to it. And then I found a pair of oxblood pointy toe flats in suede with the cutest buckle detail. People, you know I bought all three pairs of shoes.
Here comes the point: I got home and realized that I didn't have any room for my new shoes. I tried rearranging to no avail.
 |
| Hanging shoe rack, wire shoe rack, and floor: full. |
I shopped the house and thought the ladder bookshelf that lives in our dining room (right where that buffet that Steve told me he'd make will live one day) might be the solution to my issue.
 |
| The photo's bad, but at least I restrained myself long enough to take one! |
Nope. It was cute, and I liked that my shoes looked like they were on display instead of just shoved in some cubbies, but I still didn't quite have enough room.
Steve brainstormed a fancy shelving system that he could build me. We estimated it'd cost about $150. Large enough for more pairs of shoes than I own, and with customizable cubbies. Sounds cool right? No matter how cool it would be, I just couldn't justify spending $150 to make a thing to hold the things that I'd just spent money on at Nine West.
So I canvassed the garage, found two extra shelving brackets, some of the same MDF that Steve used to support the shelves he built in our office closet and kitchen pantry, and two leftover planks of the nice primed/edged shelving material. Steve whipped the shelves up in about 45 minutes, and I followed behind patching the screw holes and putting a couple coats of white semi-gloss paint on everything to make it look clean and uniform.
 |
| Ready to roll! |
And while we were working on a better way to organize my shoes, we found a better way to organize Steve's, too. He inherited the tall wire rack that I used to use, and his slim press-board cubby fit perfectly under the bottom shoe shelf on my side to give an extra layer of storage for my flat sandals and tennis shoes. Check out how my shoes live now!
 |
| SO MUCH SHOES! |
I love that I am able to keep everything organized. Flats get the top row. Heels get the middle row. Seasonal and athletic shoes get the floor. It's so easy to see everything. I never "lose" a pair of flats because there's nowhere for them to hide anymore. Since they're organized by style and color, I get the thrill of feeling like I'm shopping every time I go to pick out my shoes for the day (or pick an outfit to match the shoes I want to wear). It's also forcing me to keep my shoes neat. Why would I kick my shoes off in the closet when I can display them so prettily? Here's the thing that really kills me about these shelves, too. My closet is the exact same size it has always been, but I GAINED closet space. I can hang more items because I no longer have a hanging shoe rack, and I am fully utilizing the bottom portion of my closet.
 |
| LOOK AT ALL THOSE SHOES! |
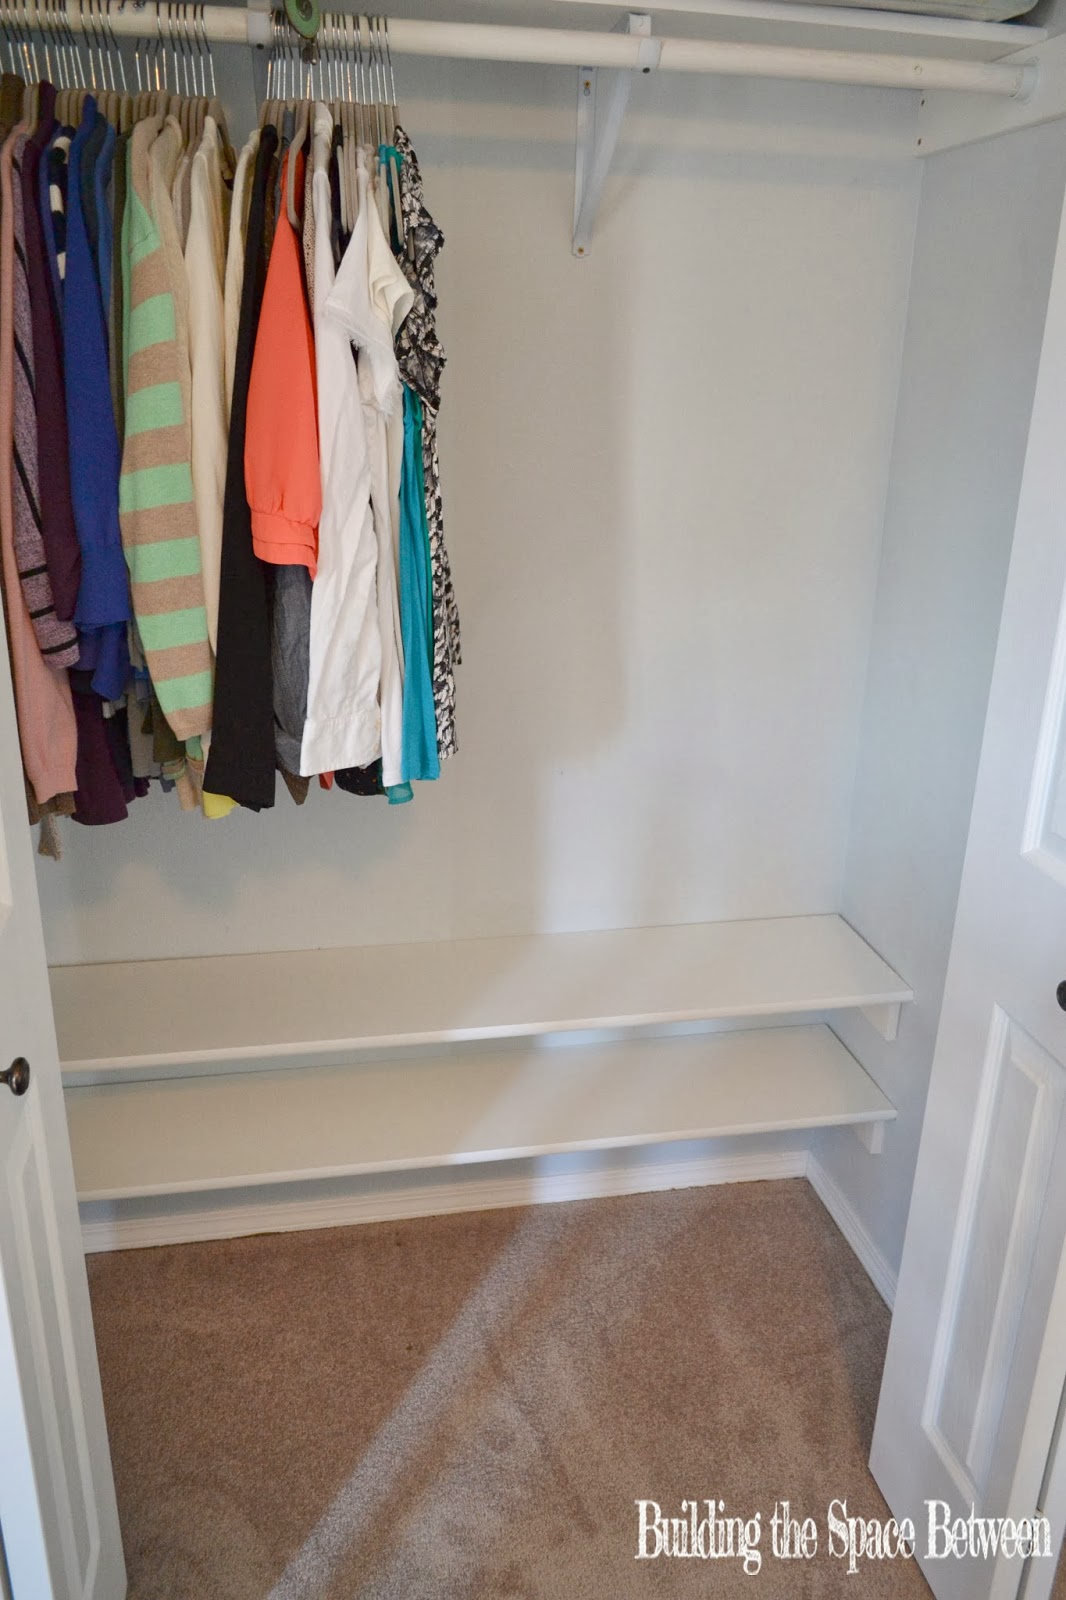
Here's how Steve's closet looks now that he reorganized his shoes, too.
 |
| Note: the purple dress does not belong to Steve. |
Makes a pretty big difference, eh? I love that this was such an inexpensive and easy upgrade. We had everything we needed on hand already, but even if you had to buy the brackets and boards you'd spend less than $25. Does anyone else have clever shoe storage ideas to share? You never know then next time I'll run across some adorable 11s that need to come live with me!