Pages

Showing posts with label Organizing. Show all posts

May 26, 2015

Organizational Drift

Once upon a time, my kitchen cupboards were organized.  Then two things happened.  One, we let three years go by without changing a thing.  Lots of stuff happens in three years!  Glass measuring bowls break.  You get a new (larger) crockpot as a Christmas gift.  Your husband helps you put away clean dishes somewhere other than where you normally put it away (where IS that casserole dish?).  You have a baby.  Which brings me to number two.  Once Connor started crawling and pulling up, suddenly everything needed to be rearranged and locked away for the sake of baby-proofing.

Not that this has gone quickly, but every week or so I manage to get one more cupboard a little fixed up to make room for baby items and keep sharp and breakable things behind child-locked doors.  Our lower-level lazy susan was the most recent to get a full overhaul.  Here's my process for decluttering and reorganizing in the kitchen.  *Fair warning: lots of unedited pictures in poor lighting follow.

First I completely empty the space to be organized.

Empty susan.

This allows me to see exactly what I'm working with.  You can see the lazy susan held an assortment of bowls, measuring cups, colanders, and some odds and ends.

Gotta get worse before it can get better.

Next the space gets a good cleaning.  I am so grateful that the trays on our lazy susan are plastic.  Makes it super-easy to clean them with a soapy cloth.

How did this manage to get sticky??

Then I take stock of what I have and think about what would make sense to live in the space.  In our case, I decided to make the top shelf all about blending.  I was tired of our blender and all things protein smoothie cluttering up our countertop.  Plus its attachments were scattered throughout our kitchen- some in the pantry, some in the island.  Now the most frequently used blender parts are front and center on the lazy susan and our counter is no longer covered in protein powder dust on the regular.

The view.


Smoothie powders and blender cups.

We decided to use the lower level for items used in cooking, plus the large blender attachments.  Now our large measuring cups and bowls and colanders are arranged in order from most to least frequently used since the lazy susan only opens in one direction (thanks to baby-proofing door locks).

Measuring up

Not a strain (see what I did there?)

So much better!  My next step will be relocating an iced tea pitcher and a couple of glass serving bowls.  Maybe I can find some time to get to it next week?  Ha!


May 14, 2014

Office Updates

Three things drove me to do a little overhaul of my side of the office in the midst of a not-quite-finished guest bathroom, landscaping and yard care like the dickens, and setting up a nursery for Mr. Baby.  1) Many things getting moved out of Mr. Baby's room needed rehoming in our office; 2) Some things getting moved out of the guest bathroom needed rehoming in our office; 3) IT WAS A MESS.

See what I mean?  Good luck finding scotch tape in there.

As usual, I had let too long go between organizational overhauls and I was tired of constantly digging to find whatever random office supplies I needed for the given job at hand.  It was time to purge and restructure.  Plus I had started feeling like the masculinity of our office was taking over the whole room and I wanted to inject a little "clean and girly" vibe on my side of Steve's gargantuan computer monitor.

Here's where I ended up:

Less blurry in real life.

I only bought four things to overhaul my side of the office.  Cute little stacking containers rounded up small office supplies and enabled me to group them easily by type.

Got these in the clearance section at Staples.

Small storage boxes specifically meant to fit our Ikea Expedit unit allowed me to group collections of items by use and brighten things up in the room.

I heart Ikea.

High quality wrapping paper and the blogging world's ubiquitous Martha Stewart bookplates allowed me to transform donated shoe boxes into pretty custom-sized labeled boxes.  Most shoe stores will save castoff shoe boxes for you if you just ask nicely.

The bottom row of boxes now holds our bows, ribbon, wrapping tissue, and bags that used to be stored in the chest of drawers in Mr. Baby's closet.  The rolls of wrapping paper have been corralled against the end of the shelving unit using two Ikea plastic garbage sack holders (I can't claim credit for this genius idea, I saw it on Pinterest).

I still have too much wrapping paper.

I purged some books from my collection (it was fun while it lasted, Twilight) and others (favorite childhood books of mine and a few of my Mom's!) were moved to Mr. Baby's room.  The OCD freak in me loves that my books are now separated by genre- fiction in one cubby, non-fiction in the next, and keepsakes like yearbooks and Bibles in the next.

All of my printer-compatible paper now lives in one box together rather than stacked on its side which will make for less bent corners.  I love that there's a separate box for software and ink- things that I need to keep but don't access frequently.  Perhaps my favorite box is the one labeled "Mail Kit" that I stocked with our business size privacy envelopes, return address stickers, and stamps.  I LOVE having all the things I need to pay a bill or mail a card in one spot, and I love being able to simply pull it down from the shelf to use it and then close the lid and stick it back on the shelf when I'm done.  Life hack!!

Mail Kit, Ink & Software, Paper & Printables; To be filed.

The mercury glass collection that has lived in our guest bathroom since we finished it has found a new home on top of my side of the shelving unit, along with a silver serving platter that we got for a wedding gift and is too beautiful to put food on, and a picture of my co-workers (who are some of the best and most inspiring educators I know).  Overall my arrangement lacks balance, especially with so much going on at Steve's end of the shelving unit, but some of his office-y things (like the giant Corsair poster) may also be moving to Mr. Baby's room, so I'm OK with the lack of balance for now.

Work in progress, but much improved!

Now I'm just keeping an eye out for some art that inspires me and lends to the clean, girly feeling to go on the wall next to my degrees and I'll be completely satisfied.  Until the next time my organization gets unruly!

Sep 23, 2013

Shoe Shrine

I have an awkward confession.  I have big feet.  Like, really big for a gal who tops out at 5'7".  I  wear an 11.   And, being a girl, I harbor a deep abiding love for cute shoes.  This has led me to be a compulsive shoe buyer.  I hunt religiously for 11s.  If I see them in a cute style, and I try on that style, and if (miracle of miracles) they fit and are comfortable and don't make my feet look like boats, I buy them.  End of story.

Well, almost.  It's gotten to a point where it's become difficult to wrangle so many pairs of cute shoes.  Especially now at the tail end of summer, where every pair I own that's not boots gets a little action.  It's not like wintertime when all of my sandals get tucked up for the season and I have tons of closet space for my little closed-toe pretties (#firstworldproblems).

I have a point, I promise.  About a month ago, Nine West had an amazing sale.  They pretty much never stock 11s, but I love to browse anyway.  So back in the clearance section, I found a pair of amazing coral flats.  In 11.  And way comfortable.  And $14.  IKNOWRIGHT!?!  And wouldn't you know they had a pair of navy patent flats right next to it.  And then I found a pair of oxblood pointy toe flats in suede with the cutest buckle detail.  People, you know I bought all three pairs of shoes.

Here comes the point:  I got home and realized that I didn't have any room for my new shoes.  I tried rearranging to no avail.

Hanging shoe rack, wire shoe rack, and floor: full.

I shopped the house and thought the ladder bookshelf that lives in our dining room (right where that buffet that Steve told me he'd make will live one day) might be the solution to my issue.

The photo's bad, but at least I restrained myself long enough to take one!

Nope.  It was cute, and I liked that my shoes looked like they were on display instead of just shoved in some cubbies, but I still didn't quite have enough room.

Steve brainstormed a fancy shelving system that he could build me.  We estimated it'd cost about $150.  Large enough for more pairs of shoes than I own, and with customizable cubbies.  Sounds cool right?  No matter how cool  it would be, I just couldn't justify spending $150 to make a thing to hold the things that I'd just spent money on at Nine West.

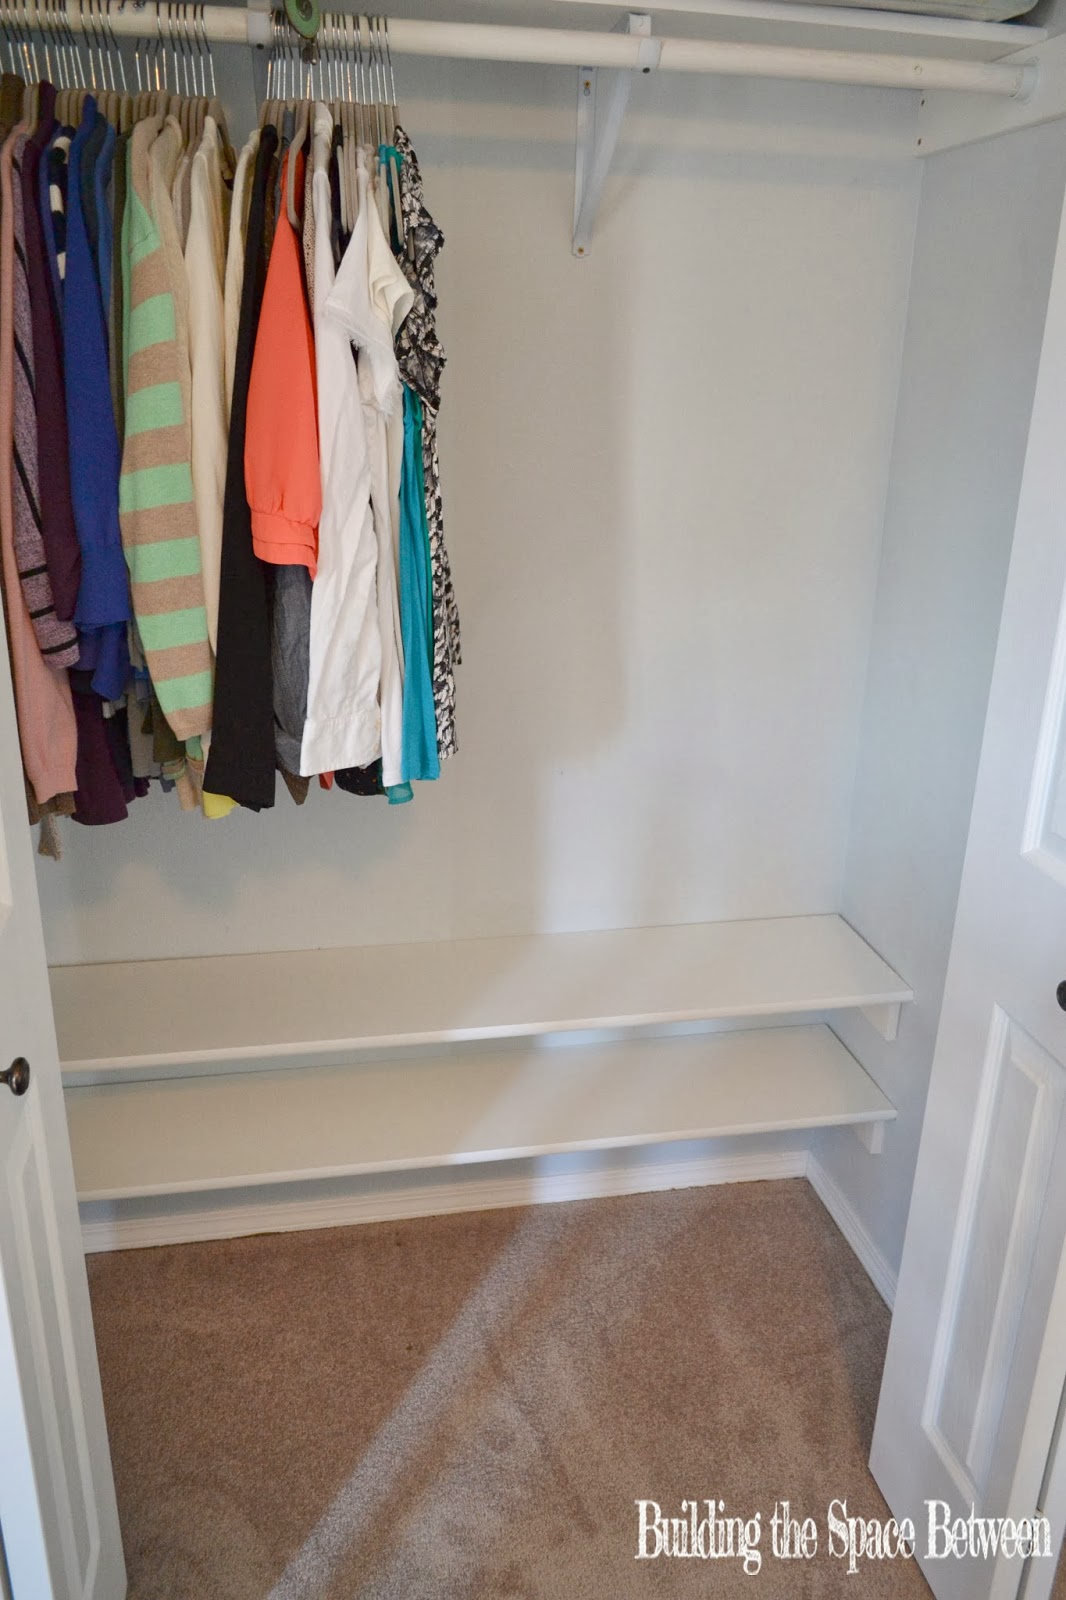
So I canvassed the garage, found two extra shelving brackets, some of the same MDF that Steve used to support the shelves he built in our office closet and kitchen pantry, and two leftover planks of the nice primed/edged shelving material.  Steve whipped the shelves up in about 45 minutes, and I followed behind patching the screw holes and putting a couple coats of white semi-gloss paint on everything to make it look clean and uniform.

Ready to roll!

And while we were working on a better way to organize my shoes, we found a better way to organize Steve's, too.  He inherited the tall wire rack that I used to use, and his slim press-board cubby fit perfectly under the bottom shoe shelf on my side to give an extra layer of storage for my flat sandals and tennis shoes.  Check out how my shoes live now!

SO MUCH SHOES!

I love that I am able to keep everything organized.  Flats get the top row.  Heels get the middle row.  Seasonal and athletic shoes get the floor.  It's so easy to see everything.  I never "lose" a pair of flats because there's nowhere for them to hide anymore.  Since they're organized by style and color, I get the thrill of feeling like I'm shopping every time I go to pick out my shoes for the day (or pick an outfit to match the shoes I want to wear).  It's also forcing me to keep my shoes neat.  Why would I kick my shoes off in the closet when I can display them so prettily?  Here's the thing that really kills me about these shelves, too.  My closet is the exact same size it has always been, but I GAINED closet space.  I can hang more items because I no longer have a hanging shoe rack, and I am fully utilizing the bottom portion of my closet.

LOOK AT ALL THOSE SHOES!

Here's how Steve's closet looks now that he reorganized his shoes, too.

Note: the purple dress does not belong to Steve.

Makes a pretty big difference, eh?  I love that this was such an inexpensive and easy upgrade.  We had everything we needed on hand already, but even if you had to buy the brackets and boards you'd spend less than $25.  Does anyone else have clever shoe storage ideas to share?  You never know then next time I'll run across some adorable 11s that need to come live with me!

Jul 22, 2013

Taming of the Pantry

It may not be a classic novel, but it's a classic problem.  If you are lucky enough to have a pantry with food in it, you have undoubtedly have experienced pantry disorganization chaos.  It had been about a year since our last cleaning and organizing pantry purge, so it was time.

The top half.

The bottom half.

I decided to start at the top and work my way down.  My organizing method is basically to pull everything out, sort it, make a plan for organizing and then put it back.  Or, Make It Worse to Make It Better.  So I pulled everything off our top shelf, which serves as our liquor cabinet.  Once I got everything pulled out, I was able to sort the liqours by type.  I also make a collection of unopened bottles that got moved to the same place as unopened wine bottles.  And then I was left with a huge collection of bottles that were almost empty, spoiled, or hadn't been used in at least two years.

See ya.

Some of the bottles must've been inherited from Steve's parents.  Check out the price on the bottle of Creme de Menthe!

Throwback.

Everything that was left got put back in, loosely organized by type of liqour and then bottle height (so we could see as many of the labels at once as possible- I hate it when we buy something because we think we're out only to find it hidden at the back of the shelf after the fact).  We had so much room left that we moved our extra mason jars and flavored syrups to the top shelf as well.  For two fairly tall people, seeing and accessing things on the top shelf is easier than seeing and accessing things on the floor, which is where the extra mason jars and flavored syrups used to live.

Rank and file.

I tackled the next two shelves the same way.  Here's everything that didn't get tossed, grouped by the type of food.

Cliques. 

I decided to do both of the shelves at the same time so I could FINALLY get around to patching and finishing them two coats of semi-gloss paint.  It's only been two years since Steve built those pantry shelves.

Looking good!

Then came the tricky part.  I decided that I wanted to store my grouped items in boxes for a couple of reasons.  I liked the idea of being able to pull a box out  and just sift through a few items to find something I was looking for instead of scouring an entire shelf (or two).  I also knew that if we had labeled boxes, both Steve and I would be more likely to put things back in an assigned place rather than just shoving them onto any open shelf space.  I figured I could get a couple of boxes with high sides to make it easier for stacking canned goods without toppling them.  Plus, using a wipeable box or basket would be really handy for storing things that tend to leave residue on shelving like cooking oils.

After lots of measuring, I decided to use what I had as much as possible and the purchase a few plastic bins.  I was able to re-use some cardboard packages by covering them with wrapping paper or a few coats of white gloss spray paint.  Less messy things like pre-bagged snacks and boxed items ended up in those, since they're less liekely to need wiping.  I ended up buying one large plastic bin and three tall and narrow ones from Target.  I'd estimate that using materials I had on hand to make three bins myself saved me about $25.

Bin city.

This was also my first foray into the world of Washi Tape.  I definitely think it's fun, like stickers for grown ups.  But I'm not fervent about it like so many people in the crafting/DIY world seem to be.  Regardless, it was a fun and practical way to label the bins.

Label madness.


Help yourself.

This stick-it-in-a-wipeable-bin strategy has worked really well for the lower part of our pantry for about a year now.  All of my baking items are held in one itso tray.  When the mood strikes to bake, I just pull the tray out and go to town.  The corn syrup drips and cocoa powder reisdue can be wiped off the tray and our pantry shelves stay in good shape.

Baking on the left, disposable food containers & napkins on the right.

And because of reorganizing with the bins and a little juggling of my large snaplock storage, we had enough room to move our small appliances into the pantry.  It may not seem like a big deal, but our Foodsaver and blender have been making the rounds between the top of our washer and dryer to our kitchen table to our breakfast bar and back for a few months now.  I am so excited that they finally have a place to live!


Home at last.

 Overall I am very happy with how this organization project has turned out.  I was somewhat concerned that it would be difficult to access some of the bins, but so far that hasn't been the case.  And Steve has given this system rave reviews- he loves being able to pull a bin out to get something he needs when he's cooking.  Between the organizing, painting, shopping for bins, and putting everything back together, this project took about five hours and only cost about $25 (the cost of four plastic bins).  I don't think the pantry is picture perfect, but I think this was a good investment to make a space we use daily more functional and a little prettier.