Pages

Dec 4, 2013

Tub Thumping

Yes, that is a throwback to this terrible song from Chumbawamba.  Seriously, what were we thinking??


When we last talked, we had a big gaping hole in our guest bathroom where the cracked acrylic tub/shower surround one was.

With a Steve getting the dust out with a Shop Vac.

Since then, we've made an even bigger mess, but we are moving forward with this project!!  Our first step was to insulate the pipe that provides water to the icemaker in our fridge.  We hoped that this would minimize mold regrowth, since it appears that condensation on this pipe may have contributed to the mold we found when we took out the tub/shower.

When I say "we" insulated the pipe, obviously I mean Steve insulated the pipe.

Next came batt insulation, to cut down on noise coming from the bathroom to our hallway and kitchen.  We were very happy to come by this for free- my parents had an extra roll stored in their barn that they donated to us.  Once all the insulation was in, we installed greenboard drywall.  Normally we would have just plunked the tub in, but because of the odd dimensions of the surround we removed, our tub was about half an inch narrower than the space between where our vinyl flooring ended and the far wall.  The greenboard is meant for damp areas (like bathrooms), so we used that to add the half inch thickness we needed for the tub to be secured against the studs without leaving a big gap between the outer tub edge and our vinyl flooring.

Steve and this framing hammer have grown very close over the last week or so.

We knew we'd run into one area of difficulty with the greenboard, courtesy of whoever plumbed this joint:

Yes, that's an outie.

Obviously the plumber wasn't very well versed in belly buttons.  The studs clearly allow for an innie, but this joint is an outie.  Steve cut away a small section of greenboard, and then used this tricky contraption to lever it up and into place so he could nail it to the studs without disturbing the outie pipe joint while I stood around and took pictures.

GENIUS.

Once he was done installing the greenboard, up went the stringer for the long edge of the tub to rest on, and then we were done for the night.

Strung.  Oh, and see the joint sticking out of the notch in the greenboard?

All that work and there's not even a tub in there yet!!  This is always the point at which I wonder to myself "What have we done??" so I'm trying to remind myself that it gets worse before it gets better.  And remind myself about why we chose to DIY this project in the first place.

Nov 24, 2013

Burning Feathers

Make that burning fiberglass (Arnold says, "It's not a tooomah.").  Steve has been very busy with power tools and respirators and frequent showers lately, because he's been demoing our guest bathroom tub, surround, and the drywall around it.

The setup.

I feel bad on projects like these because we only have one respirator, and the bathroom's not really big enough to accommodate 2 people, so Steve had to do pretty much all of this part of our bathroom reno.  My job was to document/stay out of the way.

Steve prepped by removing all of the fixtures and the shower curtain rod.

Fixtures off!

What followed was 15 minutes of terrifying noises coming from this bathroom.  Once the dust settled, I snapped this shot of Steve's progress.

Upper drywall?  See ya.

The next time Steve went into that bathroom, there was the smell of burning acrlyic that accompanied the terrifying noises.  Although Steve had a respirator on, the door closed, and the fan running, this bathroom is in the middle of our house.  Of course once I realized I was smelling acrylic dust, I ran around our house turning on every fan we own and opening all the windows.  Once Steve's dremel saw max blade was too dull to continue cutting, we took the pieces of the tub surround out to the garage.  After a couple of hours, the dust had settled enough that I could peek in the bathroom.

Almost out!

At this point, we could see the finish line.  Unfortunately, our fears about running into mold were gaining strength.  See the left hand size of the exposed drywall?

Suspicious.

I peeked between the studs.  Sure enough, it was mold.

Yuck!

Fortunately, the mold didn't look to be toxic black mold, and after doing a considerable amount of research, we decided we'd be able to kill the mold we could see here easily enough ourselves rather than having to call in a mold remediation specialist to the tune of $700 and up.  At this point, we still couldn't see under the tub itself, which is where we were the most worried about seeing water damage and even more mold.

A few days later, Steve was able to pull the tub out with help from his dad (thanks, Dennis!) and I was so relieved to poke my head into the bathroom and see this.


No black mold!!

There had obviously been some water seeping between the walls before, but we are reasonably sure that all of the mold on the drywall and water damage on the floor was from an isolated event involving the water connection for our fridge long before we moved in and condensation on the pipe.  We were able to clean the mold from the drywall as best we could, and sprayed a tea tree oil and water mixture on it to inhibit regrowth, and we're pretty sure that between that and insulating the pipe before we start putting the new tub in, we shouldn't have to worry about mold in the future.

Dodged a bullet!

The full demo process took us just over a week, which includes time to let battery-operated power tools recharge, get a replacement dremel saw blade, wait for Steve's dad to be over for a visit to finish pulling the tub out, and let the dust settle and get shopvac-ed out several times.

We're finally on our way to having a leak-free (and pretty) new tub and shower surround!

Why did we demo the bathtub since we had already finished sprucing this bathroom up?  Catch up on the back-story here.

Oct 29, 2013

Guestimates

Let's get something out of the way:  During the school year, my normal summer 1-3 posts per week becomes 1-3 posts per month.  Drives me nuts.  So I have decided that rather than blast out a bunch of posts during the summer and then dry up during the school year, I'm going to save the blog for the stuff I'm really proud of.  The major projects.  The big-impact posts.  The big potatoes.

This is the beginning of a big potato story.

Our ugly chipped fiberglass guest bathtub has bit the big one.  A large crack running most of the length of the shower pan was the nail in the coffin.  Honestly, getting this tub replaced wasn't really on our radar until recently.  We thought maybe we'd get around to doing something about it eventually, but there were so many other more pressing functional upgrades that needed to happen around our house that replacing this tub fit more in the "maybe in a few years, if ever" category.  But since we've been hosting overnight guests more and more frequently since last winter, it's been bumped to the top of the list because a) our overnight guests deserve to be able to de-stinkify themselves and b) we are really not keen on the idea of our tub leaking and causing water damage to our house.

We called some local plumbing/reno folks for estimates on replacing the tub and surround.  After four estimates ranging from $1300 to $2700 (!!!) for just removing the tub, replacing it with another fiberglass tub and surround, and reconnecting the plumbing (finishing the drywall wasn't even included!), we decided this would be a project worth DIYing.

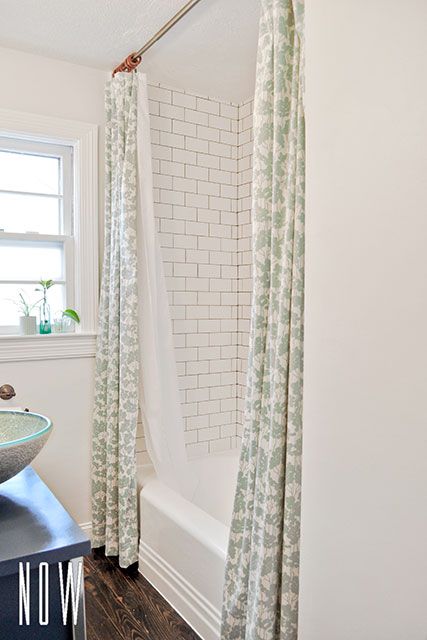
The good news is, we're going to be able to do this MUCH more cheaply ourselves and with higher quality materials... unless we run into nasty surprises like extensive water damage-- knock on wood.  The bad news is that it will take a lot longer.  We are still in the hunting/gathering phase of this project, so there are many aspects that we're still piecing together, but we are trying to cheaply source a cast iron tub and white subway tile.  I think we may have found the tub in question (on Craigslist, of course), and hopefully a trip to the local Habitat for Humanity store will yield some tile options.  In the mean time, please bear with me on the blog post dry spell, check out the inspiration photos we're using, and if you know anyone that would be willing to lend us a wet saw or Rubi cutter- hook us up!

{via}
{via}
{via}