Pages

Sep 23, 2013

Shoe Shrine

I have an awkward confession.  I have big feet.  Like, really big for a gal who tops out at 5'7".  I  wear an 11.   And, being a girl, I harbor a deep abiding love for cute shoes.  This has led me to be a compulsive shoe buyer.  I hunt religiously for 11s.  If I see them in a cute style, and I try on that style, and if (miracle of miracles) they fit and are comfortable and don't make my feet look like boats, I buy them.  End of story.

Well, almost.  It's gotten to a point where it's become difficult to wrangle so many pairs of cute shoes.  Especially now at the tail end of summer, where every pair I own that's not boots gets a little action.  It's not like wintertime when all of my sandals get tucked up for the season and I have tons of closet space for my little closed-toe pretties (#firstworldproblems).

I have a point, I promise.  About a month ago, Nine West had an amazing sale.  They pretty much never stock 11s, but I love to browse anyway.  So back in the clearance section, I found a pair of amazing coral flats.  In 11.  And way comfortable.  And $14.  IKNOWRIGHT!?!  And wouldn't you know they had a pair of navy patent flats right next to it.  And then I found a pair of oxblood pointy toe flats in suede with the cutest buckle detail.  People, you know I bought all three pairs of shoes.

Here comes the point:  I got home and realized that I didn't have any room for my new shoes.  I tried rearranging to no avail.

Hanging shoe rack, wire shoe rack, and floor: full.

I shopped the house and thought the ladder bookshelf that lives in our dining room (right where that buffet that Steve told me he'd make will live one day) might be the solution to my issue.

The photo's bad, but at least I restrained myself long enough to take one!

Nope.  It was cute, and I liked that my shoes looked like they were on display instead of just shoved in some cubbies, but I still didn't quite have enough room.

Steve brainstormed a fancy shelving system that he could build me.  We estimated it'd cost about $150.  Large enough for more pairs of shoes than I own, and with customizable cubbies.  Sounds cool right?  No matter how cool  it would be, I just couldn't justify spending $150 to make a thing to hold the things that I'd just spent money on at Nine West.

So I canvassed the garage, found two extra shelving brackets, some of the same MDF that Steve used to support the shelves he built in our office closet and kitchen pantry, and two leftover planks of the nice primed/edged shelving material.  Steve whipped the shelves up in about 45 minutes, and I followed behind patching the screw holes and putting a couple coats of white semi-gloss paint on everything to make it look clean and uniform.
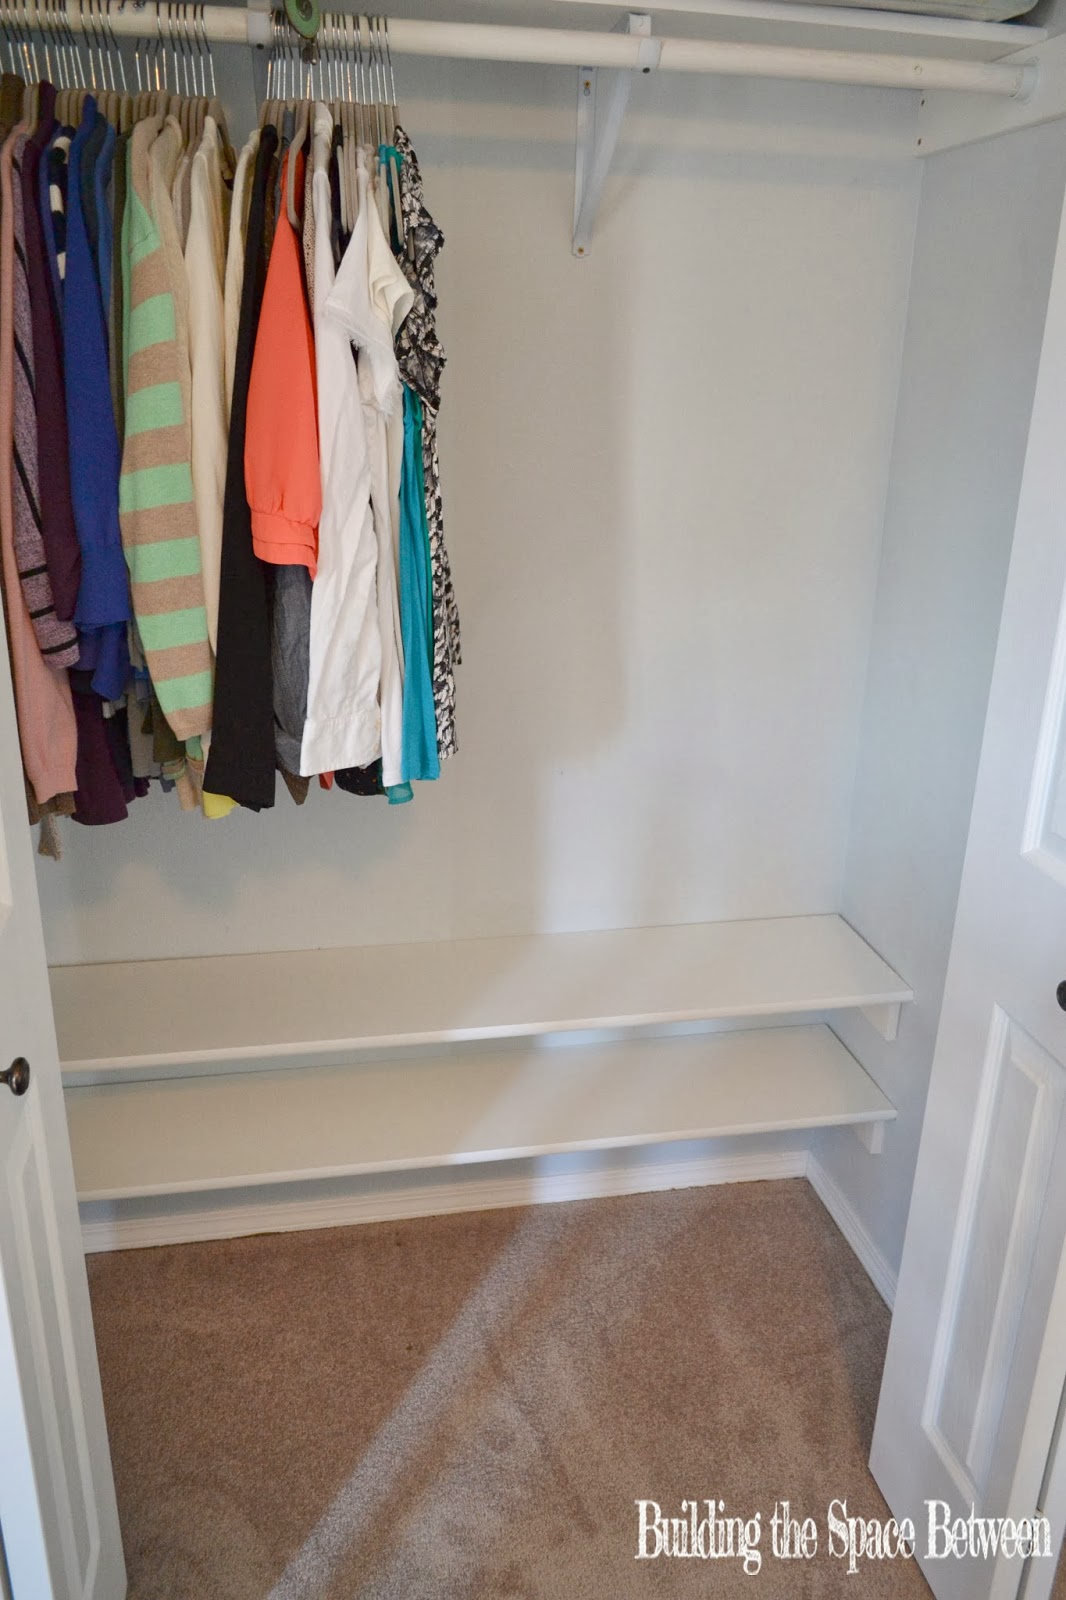
Ready to roll!

And while we were working on a better way to organize my shoes, we found a better way to organize Steve's, too.  He inherited the tall wire rack that I used to use, and his slim press-board cubby fit perfectly under the bottom shoe shelf on my side to give an extra layer of storage for my flat sandals and tennis shoes.  Check out how my shoes live now!

SO MUCH SHOES!

I love that I am able to keep everything organized.  Flats get the top row.  Heels get the middle row.  Seasonal and athletic shoes get the floor.  It's so easy to see everything.  I never "lose" a pair of flats because there's nowhere for them to hide anymore.  Since they're organized by style and color, I get the thrill of feeling like I'm shopping every time I go to pick out my shoes for the day (or pick an outfit to match the shoes I want to wear).  It's also forcing me to keep my shoes neat.  Why would I kick my shoes off in the closet when I can display them so prettily?  Here's the thing that really kills me about these shelves, too.  My closet is the exact same size it has always been, but I GAINED closet space.  I can hang more items because I no longer have a hanging shoe rack, and I am fully utilizing the bottom portion of my closet.

LOOK AT ALL THOSE SHOES!

Here's how Steve's closet looks now that he reorganized his shoes, too.

Note: the purple dress does not belong to Steve.

Makes a pretty big difference, eh?  I love that this was such an inexpensive and easy upgrade.  We had everything we needed on hand already, but even if you had to buy the brackets and boards you'd spend less than $25.  Does anyone else have clever shoe storage ideas to share?  You never know then next time I'll run across some adorable 11s that need to come live with me!

Sep 17, 2013

Post Part Two

Welp, I know it's been a month since I last posted about our post in internet land.  But really it only took two weeks of wait time, two tubes of caulk, a few cuts of cedar, and two coats of primer- we have a chunkier post!

Cedar cuts waiting for caulk and primer.

I think the balance of the post itself with the rest of the house is much better.  One problem though.  I think the head trim is too low.  It makes the post look shorter than it should, don't you think?

Lopsided?

Eventually we'd like to plank the overhang.  Remember the seepy mess that was there before we repainted last year?  Surprise, it's re-seeping through the new paint job.  And since there's so much gray going on out there, we'd like to brighten things up by painting it white, along with the trim around the ceiling.  I'm trying to decide if I should take that head trim off the post and re-caulk the top to seal it or if I should just leave it as is until we're ready to plank the overhang.

Off with the head?

What do you think?  Does it stay (for now) or does it go??

Sep 11, 2013

Touch Ups

Ok, this is not the most exciting post ever, but it is here in the interest of "keepin' it real."  Once we got our Nest thermostat installed and patched and painted the area around it, it made the rest of the hallway look a hot mess.  Our house was a foreclosure, and we're pretty sure the previous owners had a large dog (or two?  three?) that lived indoors with them.  Or who knows, maybe they just had little kids living here.  Anyway, there are lots of scrapes and gouges visible on the walls, particularly in the hallway.  We also throw bouncy toys down the hallway for the dogs.  They think this is great fun, but they tend to leave scuff marks on the wall.  The toys, not the dogs.  After successfully removing the scuff marks with a Magic Eraser, I realized that the Magic Eraser worked so well that it took the sheen off the paint.  And after a little over two years in this house, we were due for some touch ups.

I went nuts with the spackle.  And then I went even more nuts with a sanding block.  And then it sat like this for a few days over a week.

Patchy.

Patchy x2.

Then things got really wacky.  The crown in our bedroom has settled a little, and some of the nail holes and the breaks between the sticks of crown were becoming quite noticeable.  So I figured as long as I had the straight-jacket spackle and sanding block out....

Cracks ahoy!

Yikes.


Fast forward a few days and things are looking nice and fresh!

Makes the door look messy!

So fresh and so clean clean.

Where'd the crack go?

It's amazing how much more "put together" our house looks just because we addressed some small details.  Our hallway looks clean and bright again and our bedroom looks like someone who cares lives there- even when there's laundry piled on top of the bed (hee!).

What are some of your favorite little details that make a big impact?

Sep 9, 2013

Nesting

If you're on prego watch (I'm looking at you, Mom), then I'm sorry for the misleading post title.  I'm not talking pregnancy, I'm talking thermostats.

Ye Olde Honeywell.

Have you guys heard of Nest?  It's a fully programmable thermostat that learns from your habits, uses wifi to check forecasts in your area, and can be monitored and adjusted by an app on your phone.  We've heard many people talking about the convenience of Nest (too cold in the morning?  turn on the heat with your phone from bed.) and the energy- and money-saving benefits.  Yes, it's a pricey investment at $250, but we did the math and we estimate that we'll have recouped the cost through savings on our heating and cooling bills within a year.  And obviously it's a cool techy-gadget, so it was only a matter of time before Steve wanted to bring one home.

Set up and install was crazy easy.

It came with a screwdriver and stickers for labeling wires.

All connected!

It's designed by Apple expats, so the whole process was really intuitive.

Smart.

The design is sleek, and the display only "wakes up" when it senses you standing in front of it.  And obviously it's much smaller than our old thermostat.

Profile comparison.

Footprint comparison.

The most time consuming part of the whole process was removing the anchors from our old thermostat, patching the wall, and painting over the bare spot.

The wall's (almost) good as new.

We've had Nest for about two weeks now, and it's still following the schedule we gave it.  From everything we've read, it'll continue to follow our lead for another week, and then it'll start adjusting to our weather and habits without us having to change the programming.

Do any of you have experience with Nest?  What are your thoughts?